Using a FTP Client (SmartFTP)
In this tutorial to using FTP, I’ve decided to use SmartFTP. It’s free and it doesn’t come with any spyware or adware. I recommend using it for your first time, so you learn the basic skills, then move on to other FTP clients (programs) if you don’t like it. To get SmartFTP go to their download page: http://www.smartftp.com/download/.
To login to your FTP server, the three field that you have to enter are the address of the FTP server, your username and your password. All of that information should have been emailed to you, when you signed up with your host. The address of the FTP server is usually ftp.your-domain.com and/or a long string of numbers known as an IP address. Once you’ve entered all that info, login. If you’re using SmartFTP just hit the “Enter” key once you’ve typed your password.

Click the image to see larger screenshot
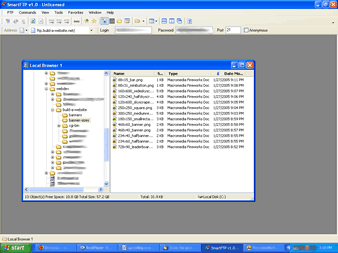
Okay now you should have a window in SmartFTP or your FTP client named “Local Browser” or something similar. If you don’t, go look for it on the toolbar. It’s usually marked by a icon with a folder that has a magnifying glass over it.

Click the image to see larger screenshot.
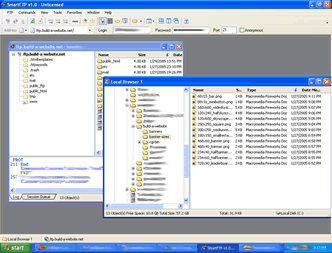
Along with your “Local Browser” window, a window that’s named “ftp.your-domain.com : Your Username” should appear after you login to your FTP server.

Click the image to see larger screenshot
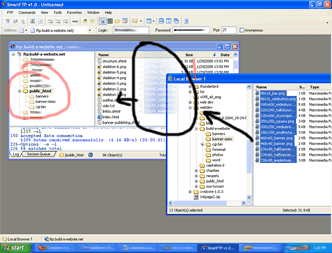
Get into your Public_HTML folder, which is the folder that you’re supposed to put your website in. Then choose the files you wish to upload to the server from your “Local Browser.” Once you’ve choosen the files simply drag them from “Local Browser” window into the other window named “ftp.your-domain.com : Your Username,” and let go of your mouse button.

Click the image to see larger screenshot
Yay! Once those files transfer you’ve successfully used a SmartFTP client! Congrats!